This week we’re moving forward in our hall bathroom floor repair project with installing cement backer board! The waterproof layer between our OSB wooden subfloor and our new penny tile. Here’s a quick overview of how we did it.

Tools & Materials Needed
- Drill/Impact driver
- Cement board scoring tool or jig saw with diamond blade
- Buckets for mixing thinset
- Mixing paddle drill attachment
- Cement backer board – I used this HardieBacker 1/2″ waterproof cement board
- 1/4″ square notch trowel
- 2″ wide high-strength alkali-resistant glass fiber tape
- Backer-on cement board screws
- Modified or unmodified thinset mortar – I used this one, check your install instructions for what type you need
- Optional: floor leveling compound – I used this one
Step 1: Measure Your Subfloor Deflection
The first step to installing cement backer board on a wooden subfloor is to determine how thick of a cement board you need. This depends on your subfloor deflection rate.
All wooden subfloors flex to some degree. The degree to which a subfloor bends between the floor joists when weight is added is called the “deflection” rate.
Too much subfloor flexibility (aka deflection) can cause cracks in your tile or grout, creating an expensive and annoying problem to fix down the road.
It’s important to determine your subfloor’s deflection rate and add support if needed before tiling. Natural stone and ceramic tile require a sturdier subfloor. Here are a few good resources on subfloor deflection:
From what I researched, you need 1 1/4″ thick subfloor for tile.
Our OSB plywood is 3/4″ thick, with 16″ joist spacing and additional blocking underneath for support. This is more than adequate for the porcelain tile I choose according to the deflection calculation I used (above). I used a 1/2″ thick cement board to reach the 1 1/4″ thick subfloor requirement before tilling.
NOTE: Information on subfloor thickness for tile is pretty confusing and inconsistent. Some resources say the subfloor needs to be 1 1/4″ thick BEFORE adding cement backer board. Others say it needs to reach 1 1/4″ TOTAL with the cement backer board.
Cement backer board does not affect the structural integrity of the floor. It doesn’t make it more/less sturdy. You may need to add an additional layer of plywood or support blocking between the joists if your subfloor has too much deflection.
Step 2: Installing Cement Backer Board
I’ve tiled two bathroom floors and a shower, but this is my first time tiling over a wooden subfloor. Information on how to do it is scarce, and I was definitely feeling intimidated I’d do it wrong. So I spent hours researching, watching YouTube videos, reading instruction guides, etc. to make sure I get it right.
Each home is unique, so be sure to do your own research to find the materials that are compatible with your specific subfloor and tile.
A. Cut The Cement Backer Board
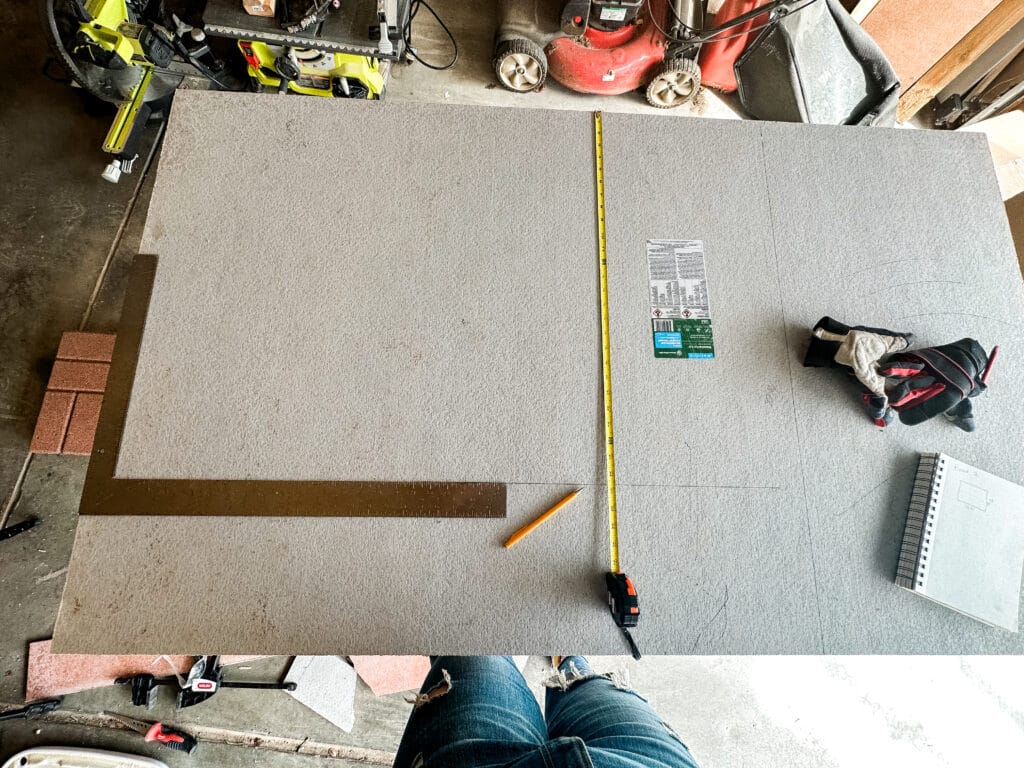
Measure your subfloor and mark the cuts needed with a pencil. A big carpenter’s square was extra handy to get a straight line across the board. Mark cuts to fit around fixtures, plumbing, and vents too.

Use a scoring tool along the measurements. Then bend/snap the cement board upwards to cut it to size.
This method worked great with our 1/4″ cement board a few years ago when we tiled our shower in the green bathroom.
But despite my best efforts, I couldn’t get this 1/2″ HardieBoard to snap this time. So we used our jig saw with a diamond blade to cut the cement backer board to size. It worked great! This created a lot of silica dust, so be sure to wear a mask and do it outside.
Once cut, dry fit your backer board on the floor to ensure the spacing is all correct. Trim or recut as needed.
A few things to keep in mind before cutting:
- Leave a 1/4″ gap by the walls and a 1/8″ gap between boards.
- Stagger the seams so that no four corners meet in the same place. This can create a weak spot in the floor.
- Run the cement backer board the opposite direction of the subfloor boards below.
B. Apply Thinset To Wooden Subfloor
Make sure your subfloor is clean, dry, and flat. Replace any parts of the subfloor that are loose, warped, uneven, or damaged.

Use a leveling compound if needed. We replaced a portion of our subfloor due to a leaking toilet, and our new subfloor piece wasn’t quite even with the rest of the subfloor. I used this Henry549 Feather Finish compound on our OSB plywood to get it flat and level again.

Mix your thinset according to the instructions and apply directly to the wooden subfloor with a 1/4″ square notched trowel.
Scrape the thinset in the same direction, covering the section under the backboard piece. Our specific backer board required a dry-set mortar or a modified dry-set mortar under the cement backer board. (I used this one)
C. Installing Cement Backer Board
Place your cement backer board into the thinset. Press firmly down on all sides. Wiggle it into the thinset back and forth to ensure good adhesion.
While the thinset is wet, screw the board down with Backer-On screws. Add a screw every 8″ on center and 2″ away from each corner/edge.

I used these 1 5/8″ screws from Lowe’s. The back of the box tells you what size you need, depending on how thick your cement backer board is.
D. Tape The Seams
Next, fill the seams between boards with the same thinset. While the thinset is wet, add 2″ wide high-strength alkali-resistant glass fiber tape and push into the mortar with the straight edge of the trowel. Add more thinset on top if needed, and then scrape off all the excess.

Try to get the seam as flat as possible to avoid a “hump” that could mess up the evenness of your tile.
Once the thinset is dry, you’re ready to tile! (Check the instructions, probably 24 hours)

What questions do you have about this process? Ask away below and I’ll send you a helpful resource!


