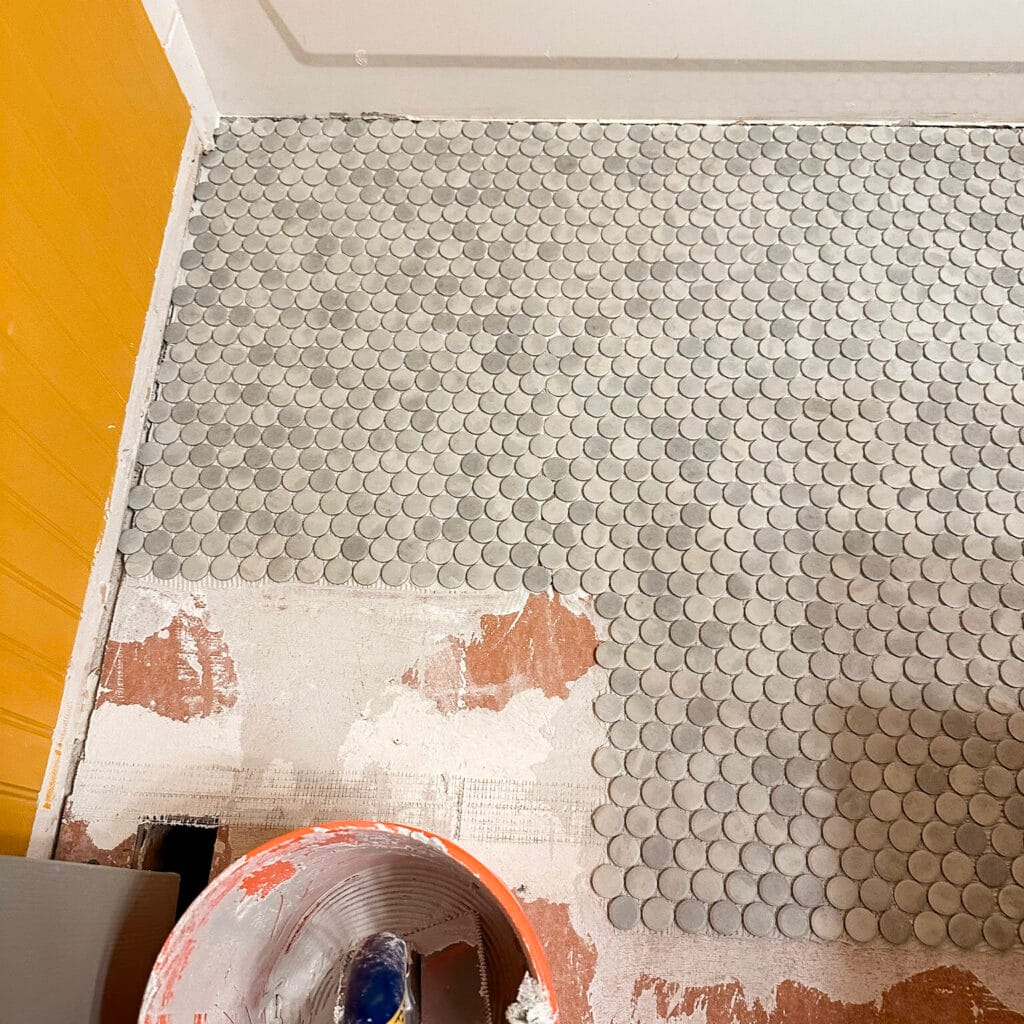
Today I’m sharing how to install tile on a wood subfloor, like we did in our upstairs hall bathroom. From start to finish, here’s what to expect in this DIY project.

Knowing how to install tile on a wood subfloor will save you tons of money in your remodel project. Tiling work can be complicated, but it’s a great skill to learn if you’re a homeowner looking to save money. Before we cover how to install tile on a wood subfloor, there’s some prep work you need to do first.
Note: If your subfloor is already cleared and ready for tile, skip to Part 2 of this post!
1. Remove The Flooring & Fixtures
First, remove all the current flooring and expose the wood subfloor below. Uninstall all fixtures like toilets, the sink vanity, tub, etc as needed. It’s best to tile as much of the floor all at once if possible!
Read: How To Remove Tile In An Upstairs Bathroom here.
2. Prepare The Subfloor
Remove any old thinset, glue, dirt, paint, etc. on the subfloor using an angle grinder or sander. Anything left on the subfloor could be a “bond breaker” between the subfloor and the new tile.

I used a 4″ razor scraper like this and a sander to clean up all the old thinset off the subfloor.

Next, replace any parts of the subfloor that are damaged or uneven.

Read: Replacing A Wooden Subfloor Under A Leaking Toilet here.
Using a big level, determine if the floor needs leveling. Smaller mosaic tiles like penny tile or 1″ hex tiles are a little more forgiving. For very small tiles, the floor needs to be flat and smooth, but not necessarily 100% level.
Large format tiles, however, require a level floor! Otherwise the tiles can crack. Use a self-leveling compound if needed and follow the product instructions for how to install it.

When we replaced a damaged portion of our wooden subfloor, the new subfloor and the old subfloor weren’t quite the same height. To make them even, I used a concrete feathering compound from Home Depot to smooth them out. It worked great!
3. Determine Subfloor Strength
Before you can tile, you need to determine the load your wooden subfloor can handle.
All wooden subfloors flex to some degree between the joists underneath. This is called deflection. Too much subfloor flexibility (aka deflection) can cause cracks in your tile or grout, creating an expensive and annoying problem to fix down the road.
It’s important to determine your subfloor’s deflection rate and add support if needed before tiling. Natural stone and ceramic tile require a sturdier subfloor.
See this post for resources on determining how thick your wooden subfloor should be before tiling. You can also reach out to your city building department for help to determine how thick your subfloor should be. Additionally, your tile underlayment install guide will tell you the support requirements for their product. (Joist spacing, subfloor thickness, etc.)
You may need to add additional plywood on top of your subfloor or bracing between joists underneath to add strength to your subfloor.
4. Install A Tile Underlayment
Once the floor is clean, flat, and level, you’re ready to install the tile underlayment. This is the material that goes on top of the subfloor and below the tile to give it an extra measure of moisture barrier.
There are several systems you can choose from. If the flooring will be subjected to water, like in a shower, choose a fully waterproof system. For the main flooring, like around the toilet and vanity, the floor doesn’t necessarily need to be 100% waterproof. Although you can if you want to! (Check your local city codes to see what’s required for you.)
The two most popular options for tile underlayment are:
A. Uncoupling Membrane
These are soft, plastic-like sheets that lay between the tile and subfloor. These are highly recommended for their easy install, durability, and waterproofing. Examples of this are Schluter Ditra or Laticrete STRATA.
These are best for:
- Easy installation
- Fully waterproofing
- Helps prevent cracking in the tiles and grout due to it’s unique engineering.
Uncoupling Membranes have a few downsides…
- Cost – These are much more expensive, comparatively.
- Additional subfloor prep needed – You may need to add additional plywood over subfloor.
- Is not compatible with mosaic or small tiles under 2″.
B. Cement Backer Board
The other popular option is cement backer boards. These are strong sheets of fiber concrete that are water and moisture resistant. These can be used on floors or walls. These are compatible with all kinds of projects, indoor and outdoor.

This was the option we selected for our project because cement backer board is best for small mosaic and penny tiles. We chose this Hardie Board Hyrdrodefense board, and have also used USG DuraRock for the shower in our old Texas house. Cement backer board is not waterproof on it’s own. It’s designed to be topped with RedGuard to add waterproofing if desired. Cement backer board comes in two size options: 1/2″ or 1/4″ thick.
These are best for:
- Small budgets
- All tile shapes/sizes
Cement Backer Boards have a few downsides…
- More steps to install.
- Can be hard to cut/measure accurately.
- Not fully waterproof on it’s own.
Choose which options works best for your project and budget! Do your research and make sure all the products you choose will work together. Between the subfloor type, the thinset, and tile underlayment. Read the instruction manuals and install guides for each to be sure.

Here’s what we used on our wooden subfloor:
- Waterproof Cement Backer Board
- Thinset between the Wooden Subfloor and Cement Backer Board
- Screws for the Cement Backer Board
- Thinset between the Cement Board joints & under Porcelain Tiles
- Fibertape
Once your subfloor is prepped and your underlayment is installed, you’re ready to tile.
>> Head to Part 2 of this post for the step-by-step guide on how to tile a bathroom floor next!


