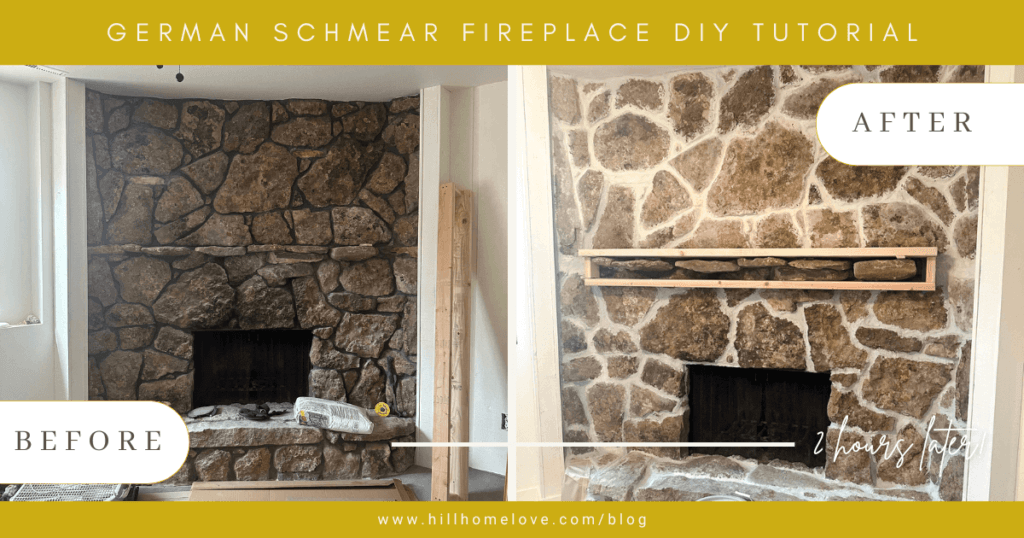
Today’s post is all about our easy German Schmear fireplace DIY I helped a friend with this week! I’m breaking down our design process, the DIY steps, and the final look all here. Everything you need to know about German Schmear to try it in your own home.
This week I’ve been helping a friend renovate their old stone fireplace! They’re getting their house ready to sell, and wanted to give this big fireplace a quick makeover. They asked if I’d help and of course I was all in.
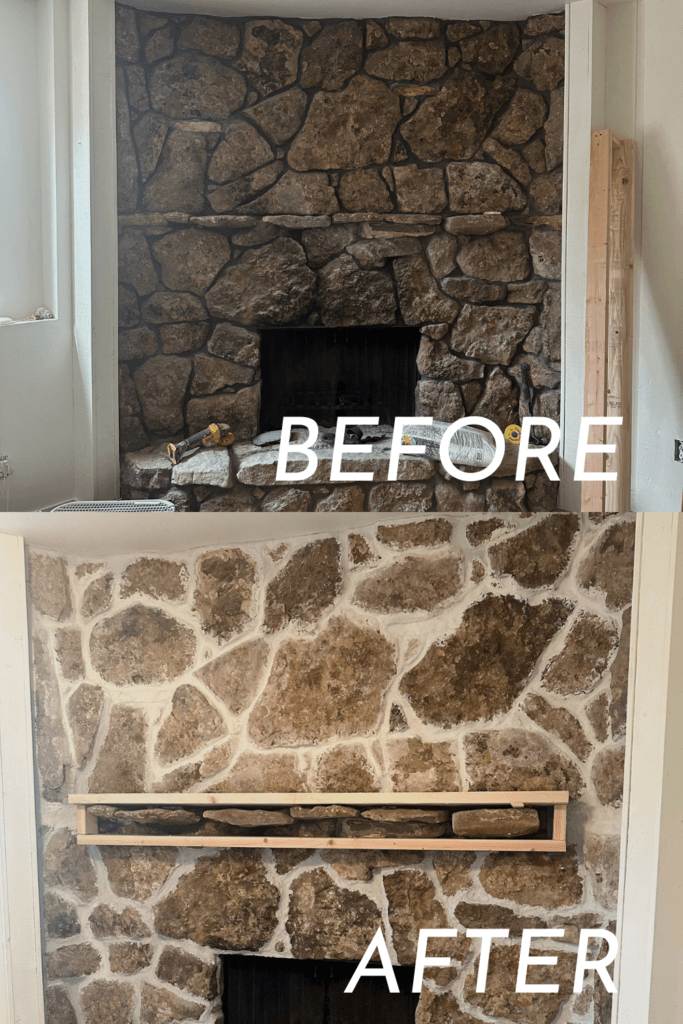
This corner stone fireplace start dark and outdated. The stones were dusty and covered in moss and soot, and the grout between the stones was dark.
But I had a feeling we could transform it into a charming focal point to match the rest of their recently renovated house.
They wanted something light, airy, and full of charm. The rest of the house was “California Coastal” style and so this needed to fit right in.
Enter the German Schmear fireplace technique.
With a little scrubbing, a little mortar, and a lot of patience, and we completely transformed their fireplace into the statement piece their home deserved.
This stone fireplace makeover totally changed the feel of the room.
If you’ve got a brick or stone surface that feels a little meh, keep reading.
This might be the easiest, most budget-friendly way to bring it back to life!
What is a German Schmear Fireplace?
A German Schmear fireplace is a decorative technique that involves spreading a thin layer of mortar or grout over stone or brick to give it a timeworn, European look.
It’s totally customizable. You can go heavy for a more solid whitewashed look or light for a subtle, weathered effect. This style works beautifully on rock or brick fireplaces to help it match your design style.
What You’ll Need for a German Schmear Fireplace:
- White tile and stone mortar
- Concrete dye
- Water
- Bucket with lid
- Mixing paddle attachment for your drill
- Gloves (I used my tiling gloves)
- Mortar piping bag
- Trowel
- Small round brush or small craft brush
- A damp sponge or rag
How To Do German Schmear: DIY Tutorial
Step 1: Prep the Fireplace
We started by giving the stone a good cleaning to remove dust, moss, and soot. Next, I taped around the edges to protect the wall and floor from mortar and water.
Step 2: Mix the mortar
We mixed the mortar using our paddle attachment, a bucket, and water. I added a small amount of gray concrete dye to soften the color a bit to match the stone. The consistency of the mortar should be like peanut butter!
Tip: If you need more than one batch of mortar, be sure to measure the amount of dye you use!
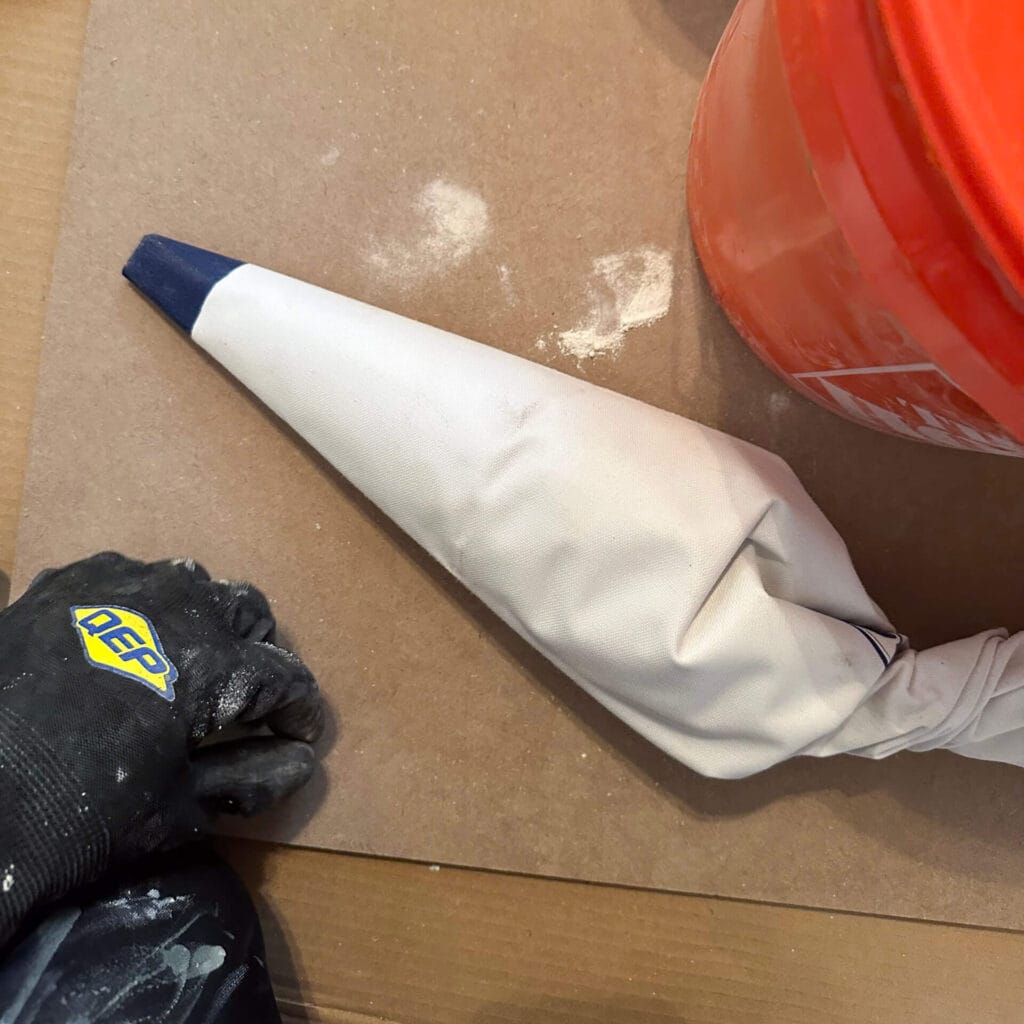
Use a trowel to scoop the mortar into the piping bag. Twist the top of the bag to keep the mortar from leaking out.
Tip: I cut the tip of the piping bag so it would be wider and leave more mortar. This made the project go faster!
Step 3: Start Smearing!
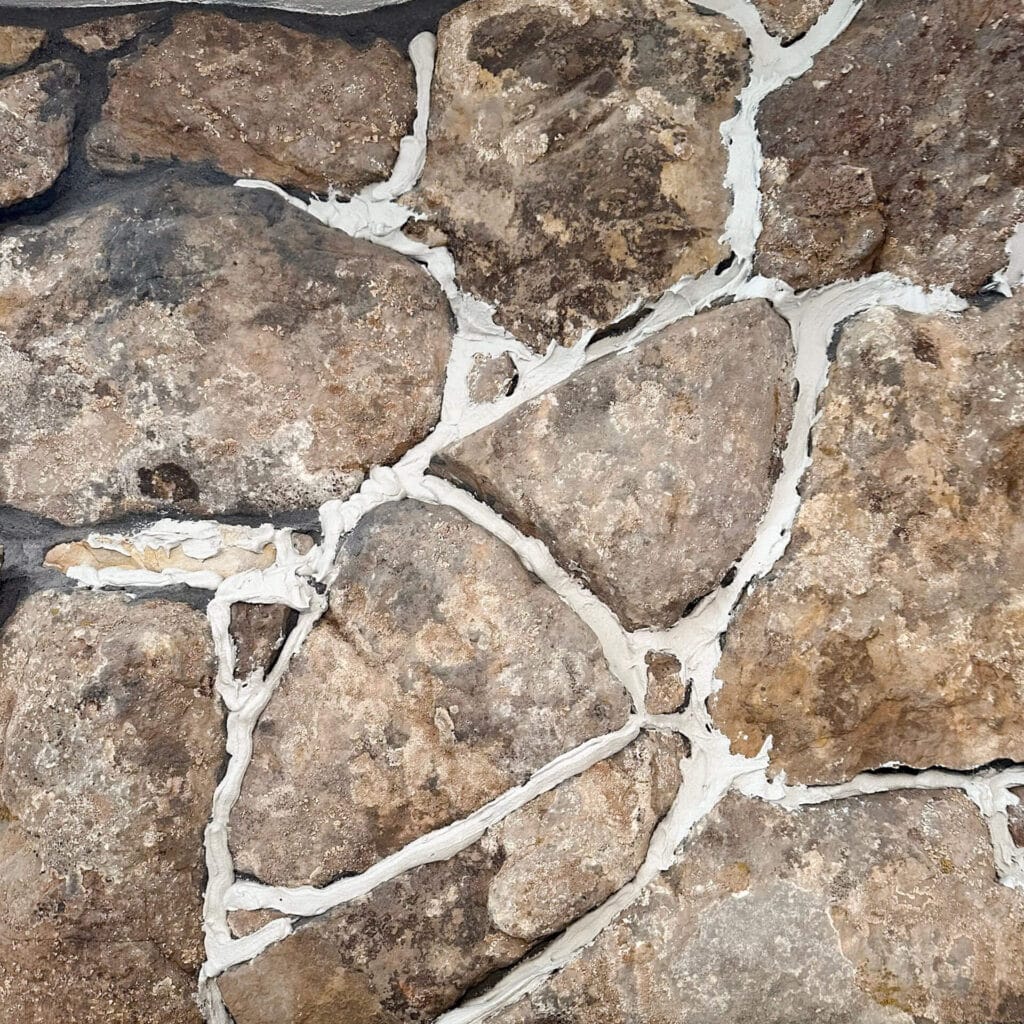
Squeezing the piping bag, I piped the mortar on top of every crevice between the stones, covering up the dark, old grout beneath as much as I could. The grooves between these stones were deeeeeeeep so I planned to do it in batches to ensure it would all dry properly.
With a German Schmear technique, you can choose how much of the stone you’d like to cover. For this project, we started small. For more coverage, go over the stone and add a lot more mortar! Enough so the stones look more “set” into the mortar.
Let the mortar dry as is for a few hours!
Here’s what it looked like right after piping:
Step 4: Step Back & Adjust
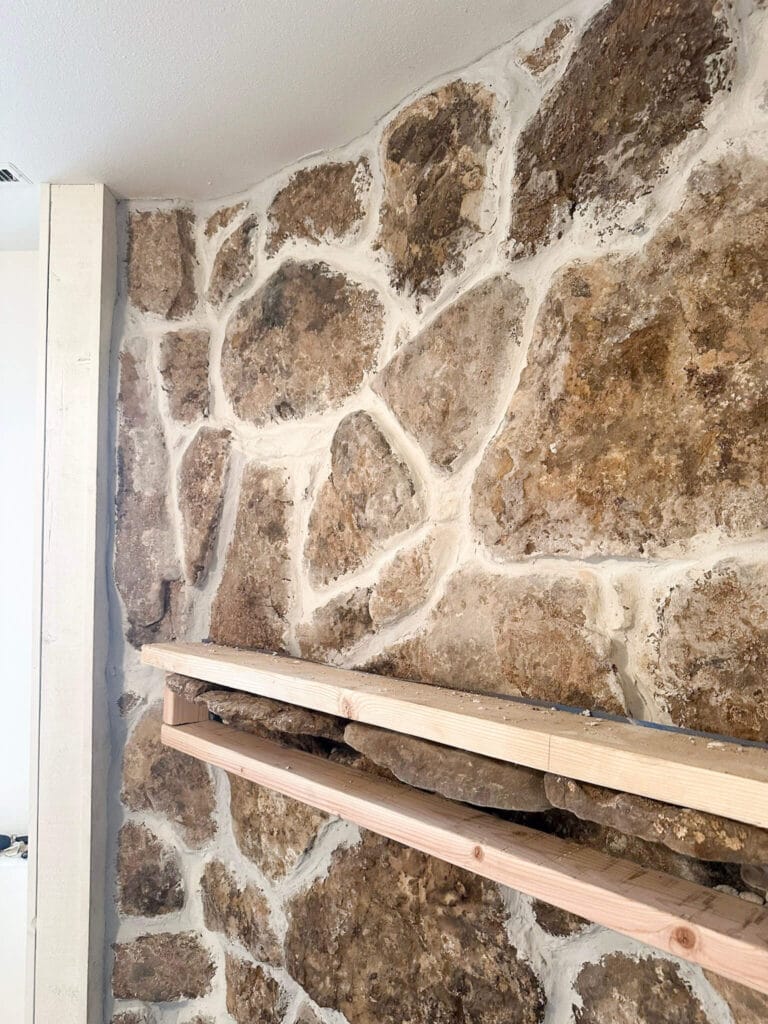
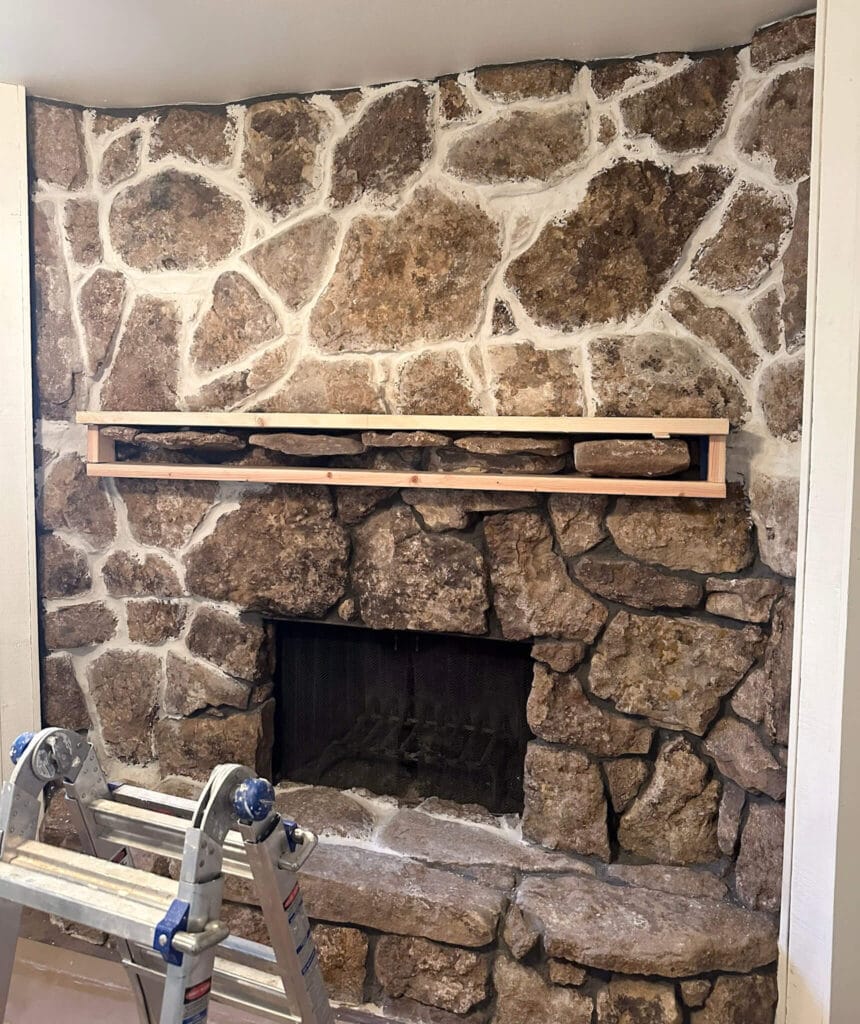
This is where the magic happens. After a few hours of drying, I went back with a craft brush and smushed the mortar against the stone to fill it all in. The mortar was tacky enough that I could carefully spread it around if needed. I used a sponge to wipe off any excess from the stones.
Tips & Tricks for a Successful German Schmear Fireplace
- Start with a small, inconspicuous area to get the feel before committing to the whole fireplace.
- Use painter’s tape around the mantel or flooring for easier cleanup.
- Work in sections—don’t try to do the entire fireplace at once.
- If you want a warmer tone, you can tint white mortar with a bit of beige, red, or gray dye.
Common Questions About German Schmear Fireplaces
What is the difference between whitewashing and German Schmear?
Whitewashing uses diluted paint to soften the color of brick or stone while still letting the texture show through. German Schmear uses mortar or grout to add texture and create a more rustic, Old World look. It’s thicker and more dimensional than paint.
Can I do a German Schmear on a painted stone or brick fireplace?
Yes! But you’ll need to sand it thoroughly first and possibly use a bonding primer. The mortar needs a slightly rough surface to grip, so prepping is key.
What kind of mortar or grout should I use for German Schmear?
White tile grout or mortar works great. We used mortar!
Do I need to seal a German Schmear fireplace?
Most indoor fireplaces don’t need sealing. But you can use a matte sealant if you’re concerned about dust or flaking, or want extra durability.
Will German Schmear work on moss rock or uneven stone?
Yes! In fact, irregular stones like moss rock like ours definitely add extra charm and character to the final look. You’ll just need to work the mortar into crevices a bit more slowly and maybe use a brush or sponge for tricky spots.
Is German Schmear reversible?
Technically, no. Once dried, mortar or grout is hard to remove without damaging the stone. That’s why starting light and building up slowly is a great approach. You can always add more, but you can’t take it back.
How long does it take to do a German Schmear fireplace?
This project took me a full day! But it depends on the size of the fireplace. Add another day or two for full curing before styling or using the fireplace.
The Final Look: German Schmear Fireplace After
Y’all. The difference was night and day. The fireplace went from a heavy, dark feature to a light, inviting focal point. The texture of the stone still shows through, but now it has that soft, European cottage feel.
This stone fireplace remodel made the entire space feel fresh and intentional. And the best part? It was a budget-friendly DIY renovation project that made a huge impact.
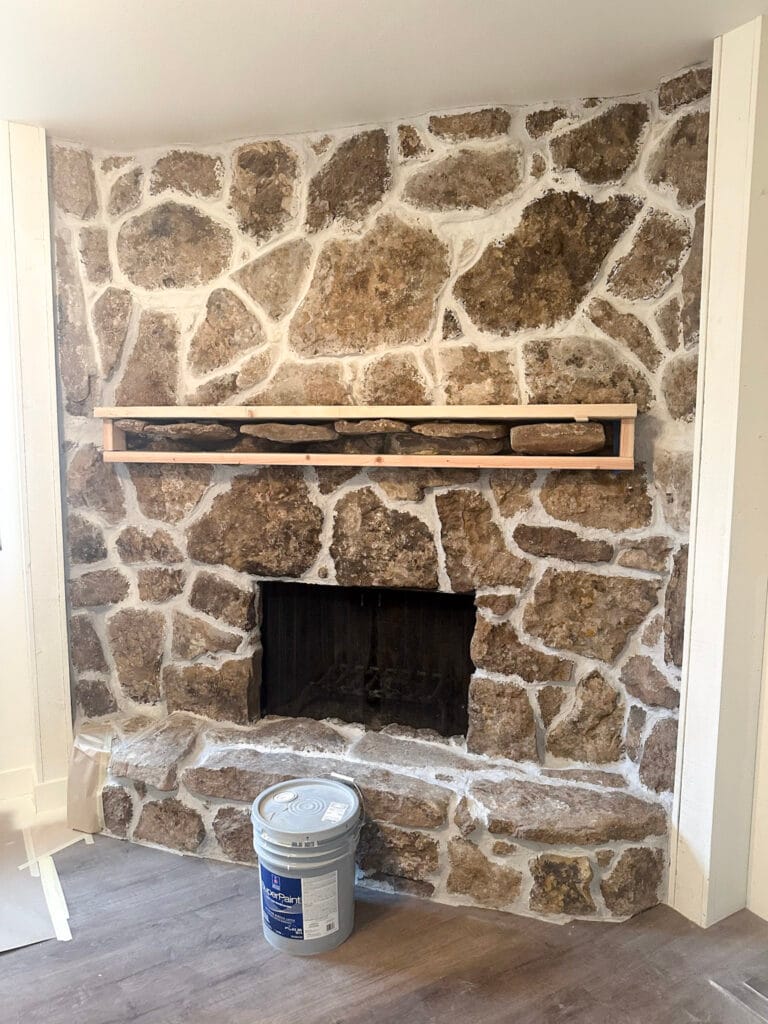
Note: This project did not go perfectly! This was my first attempt using this technique. If you look closely, you can still see heavy grooves between stones, and you’ll notice two different colors of mortar between the top and bottom of the fireplace. *whomp whomp*
If this were my home, I would have added more mortar to fully even out the stone and make sure to measure the concrete mortar dye to match each batch of mortar I mixed.
But my friend and I were taking this project step-by-step to feel out the look he wanted.
At this point, he decided to try painting it instead. We discussed covering the stone almost completely with more mortar, but since this is a wood-burning fireplace we were trying to be conscious of how dirty it would get. We wanted to make it easy to clean for the next homeowner, so we opted to paint the stone instead. The most important thing was that my friend liked the final outcome, so we changed course here!
Would I Do It Again?
100%. A German Schmear fireplace is one of those techniques that looks high-end but is totally DIY-friendly. It’s forgiving, customizable, and adds so much character. So if you or a friend have a brick or stone fireplace that’s feeling boring or outdated, grab some mortar and start schmearing.
While we ultimately went a different direction for our stone fireplace makeover, I would absolutely recommend this technique and would do it in my own home!
This rock fireplace makeover was one of my favorite before and after transformations yet.
Read more: Design Rules To Know Before Painting A Stone Fireplace
Why I Share Projects Like This
At HillHomeLove, I believe any house can feel like home with the right approach. You don’t need a huge budget or professional crew to make a big impact in your home. My mission is to make home design approachable, personal, and empowering, especially for homeowners who feel overwhelmed or unsure where to start. This German Schmear fireplace is just one example of how a simple, affordable DIY project can completely transform a space and boost your confidence in the process.
I’m here to cheer you on, help you make design decisions you love, and remind you that home is something you create one project and memory at a time.
Save this post for later!